Setting Up HTTP Proxy on Android Emulator: The Easy Way (2025 Guide)
Debugging network requests from an Android Emulator is surprisingly difficult. Should you change the settings in the Extended Controls? Or inside the Android Wi-Fi menu? Or pass a flag to the command line?
In this guide, we'll cover the two most reliable methods to route emulator traffic through a proxy tool like Debuggo or Charles.
iOS Developer? Check out our parallel guide on How to Configure HTTP Proxy in iOS Simulator.
Method 1: Extended Controls (Easiest)
This is the recommended method for most users. It sets the proxy globally for the emulator instance.
- Launch your emulator from Android Studio.
- Click the three dots (...) in the emulator toolbar to open Extended Controls.
- Go to the Settings tab on the left sidebar.
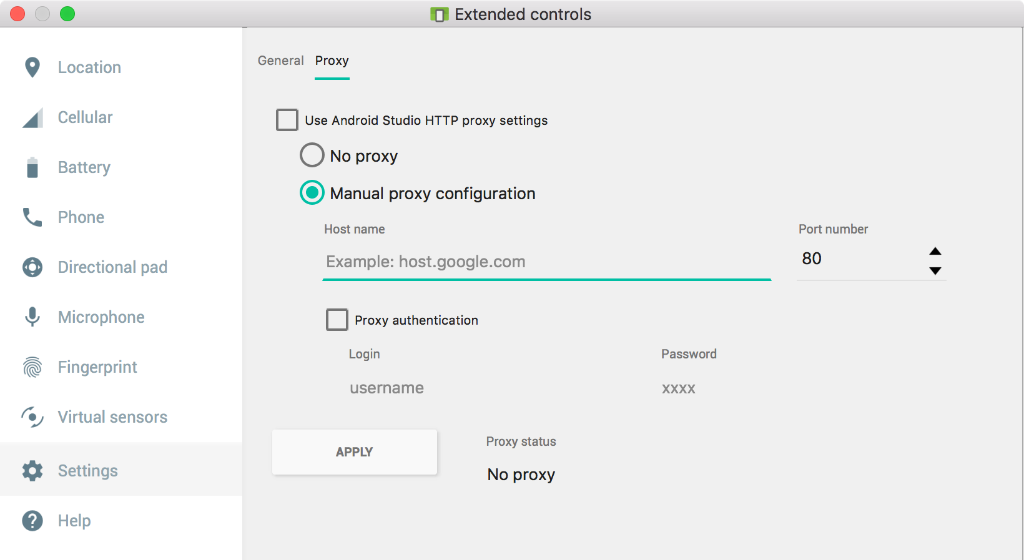
- Select the Proxy tab at the top.
- Uncheck "Use Android Studio HTTP proxy settings".
- Select Manual proxy configuration.
- Enter your proxy details:
- Host name:
chaos-proxy.debuggo.app - Port number:
11997 - Auth: Enter your username and password. (Don't have credentials? Get them for free here)
- Host name:
- Click Apply. You should see "Success" at the bottom.
▶▼View Screenshot
How "Cloud Proxy" Works
Method 2: Command Line (For CI/CD)
If you are starting the emulator from a script or pipeline, you can pass the proxy as an argument.
Crucial Step: Installing the Certificate
Even with the proxy set, you won't see HTTPS traffic (it will fail with SSL errors) until you install the CA certificate.
network_security_config.xml file to your app's source code to allow user certificates in debug mode.- Open Chrome inside the Emulator.
- Go to
http://mitm.it(or download the PEM file from your Debuggo dashboard). - Download the certificate.
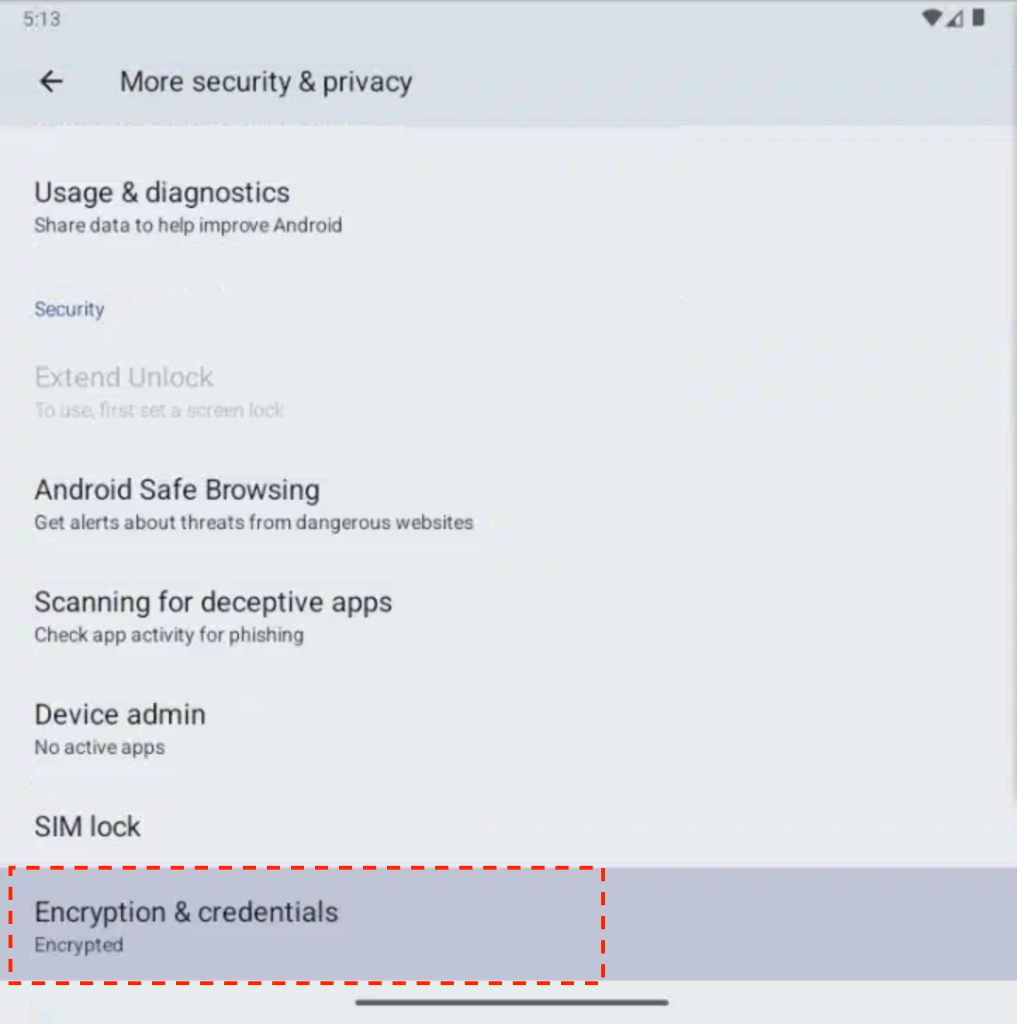
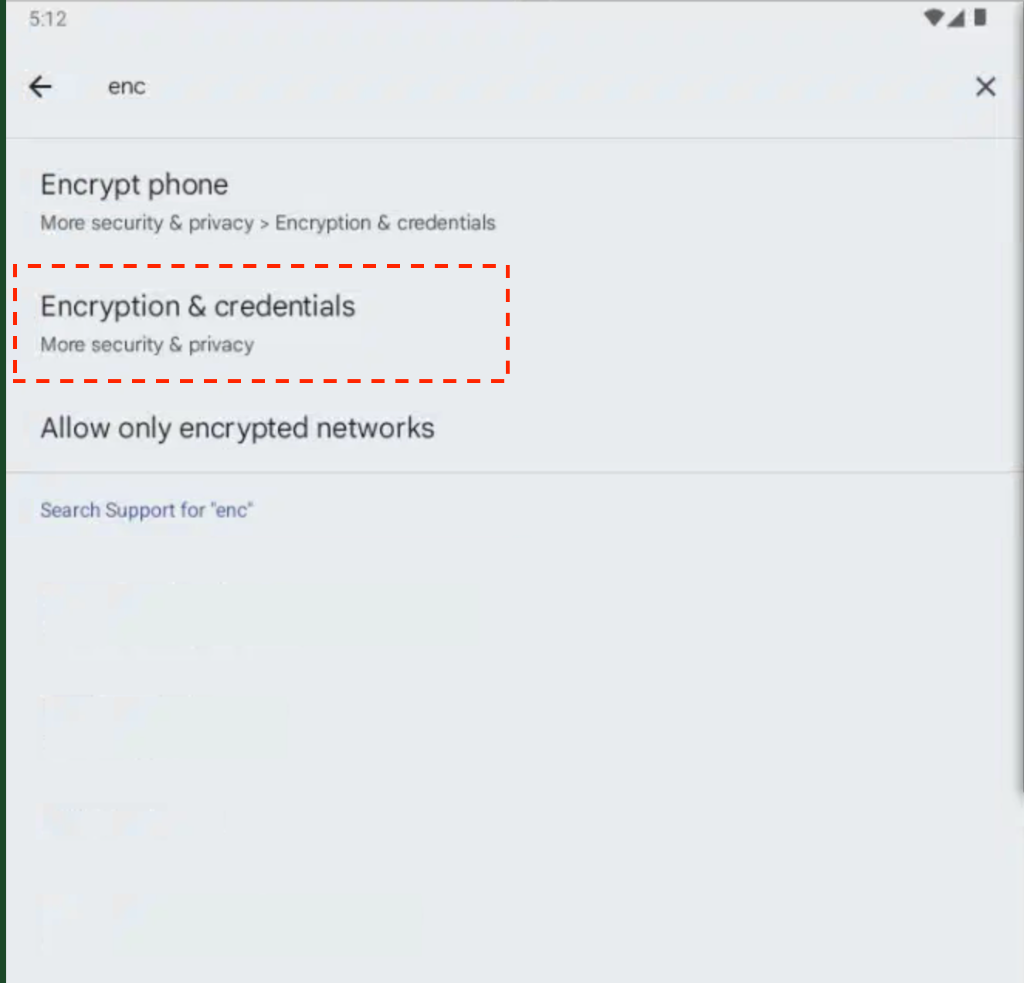
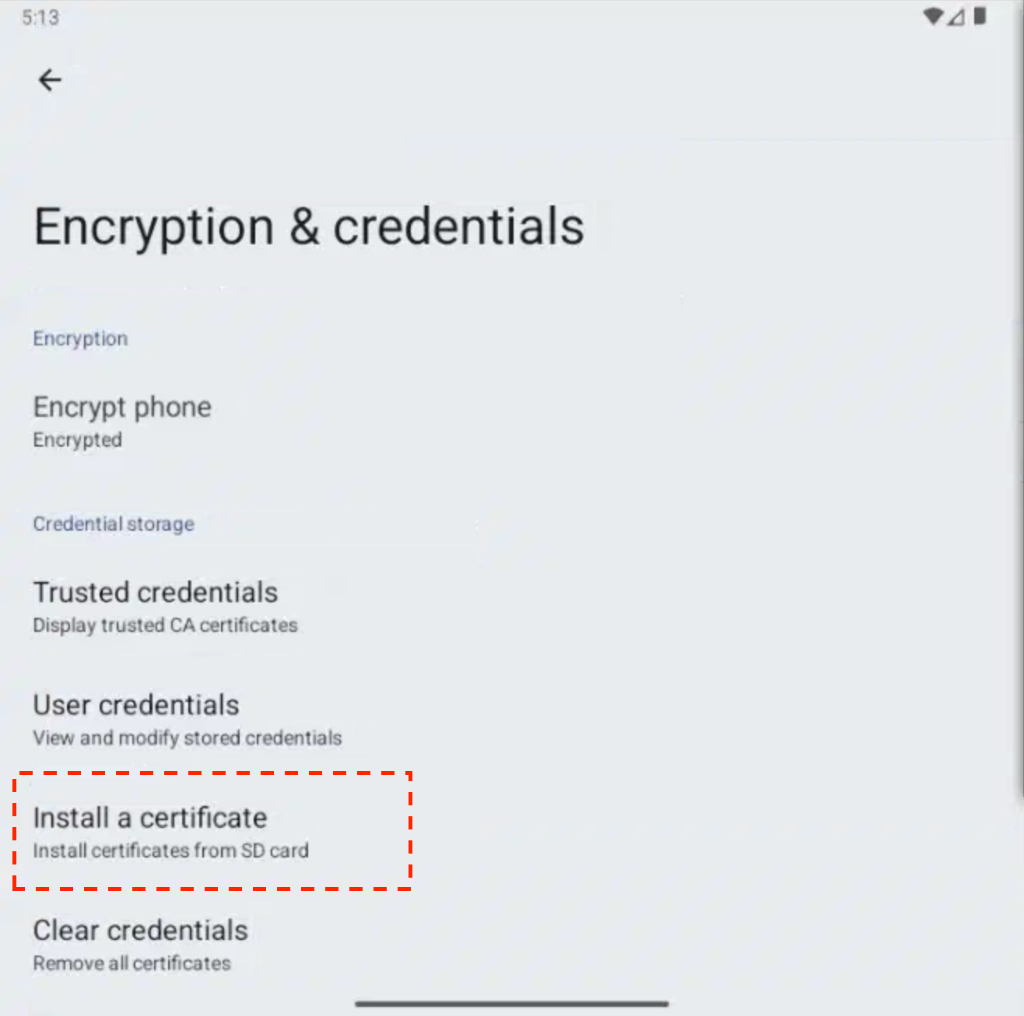
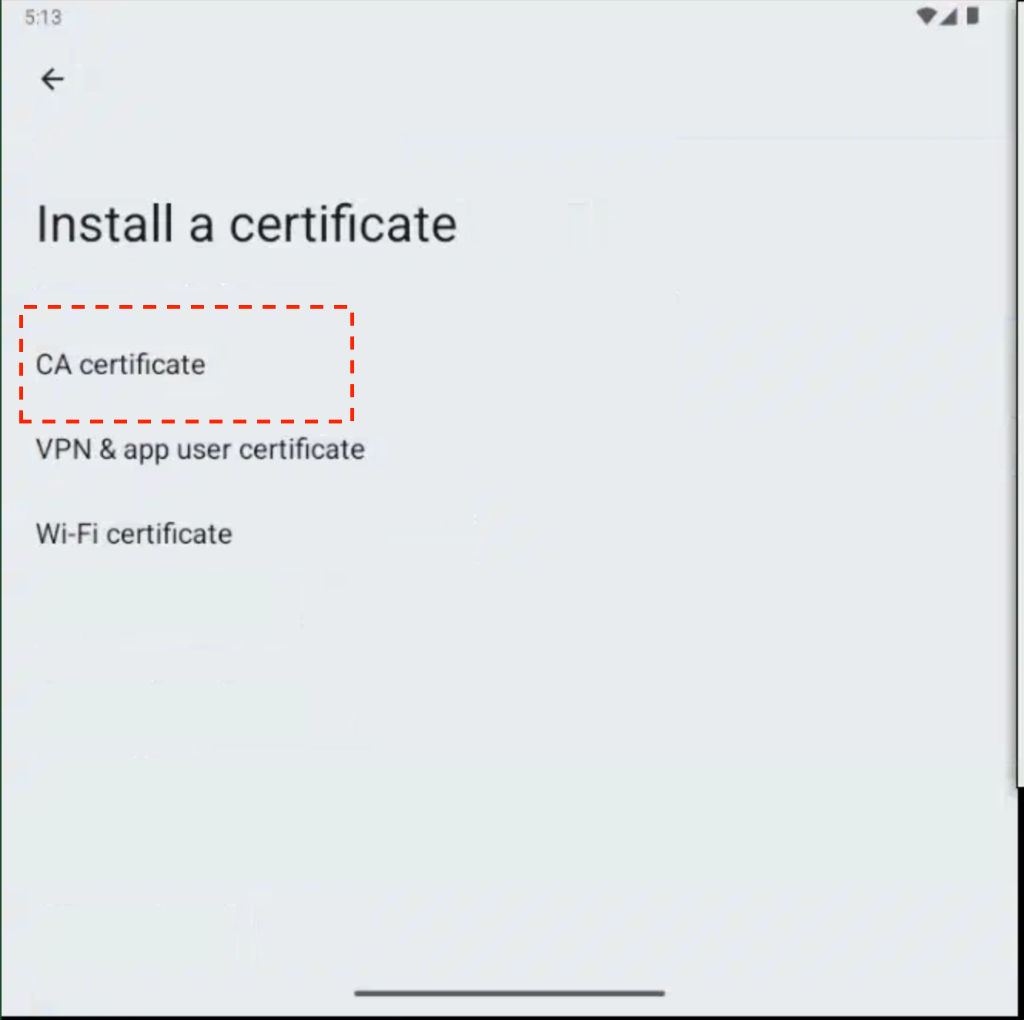
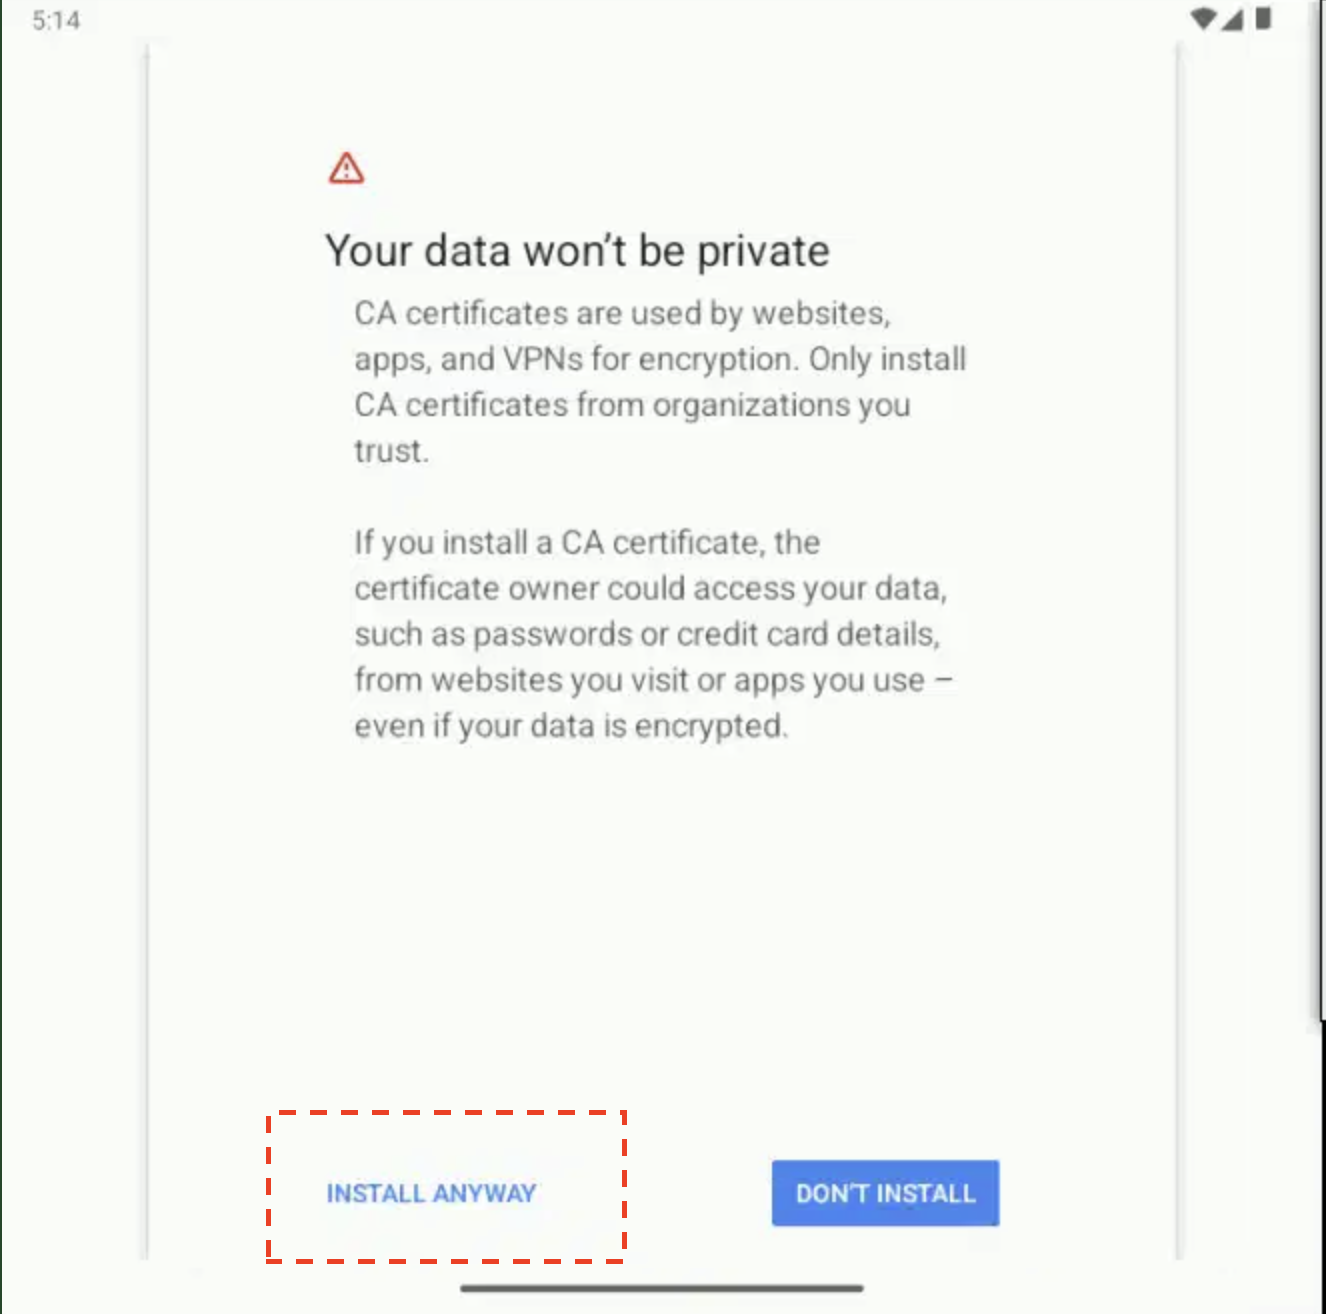
- Go to Android Settings → Security → Encryption & Credentials → Install a certificate → CA certificate.
- Select the downloaded file and confirm.
▶▼View Installation Screenshots (Step-by-Step)
Next Level: You configured the certificate? Now it's time to break things. Learn how to Kill the Database (Tip #1) to test real resilience.
Why use a Cloud Proxy for Emulators?
Using `localhost` (10.0.2.2) is often flaky. By using a cloud proxy like Debuggo, your emulator connects to the internet just like a real device would on a 4G network. Plus, you can simulate 500 Errors and High Latency to see if your app crashes.
Debugging on Desktop? Check out our guide on How to use SwitchyOmega with Auth Proxy.